
LIGhTPaINtInG iN tHe pArK
we joined a workshop hosted by Nikon (well hosted @ SGD 60..) to learn about light painting.
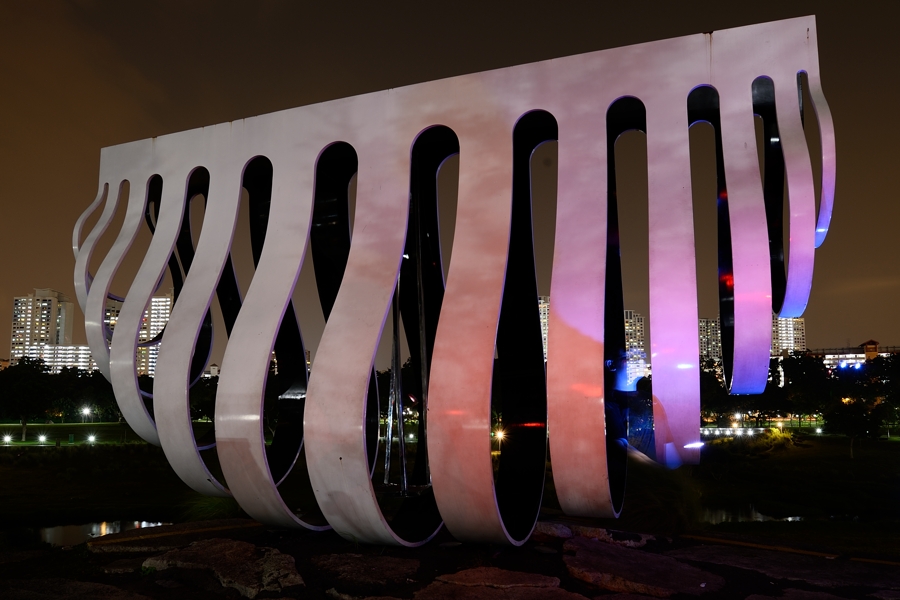
AngMoKio Park, Singapore, after dark.
what to bring
- sturdy tripod (those freebee give-away thingies WONT do the job if you have a DSRL)
- remote trigger
- wide angle lens, I used a Nikkor 18-35 mm G
- all kinds of light sources such as light sabre, bicycle lights, standard torch lights, let your creativity go wild here
- a camera would be helpful 🙂
- good things take time
- some die-hard, hard core fanatics would bring an umbrella just in case, but I have no intention to spend a night in a park in the rain playing with a light sabre and my camera….
getting started
- ISO at lowest setting (L1 on my Df), manual mode, aperture f8 for a start, bulb mode for the shutter
- pre-focus with a flashlight then switch to manual or use manual focus right away, AF unlikely to work in the dark
- use a strong torch light to paint a background, for example a statue or a sculpture, use slow, regular movements, don’t point the light towards the camera or your own face. A flashlight with colour gels mounted works as well, though I find that rather fiddly.
- with the camera settings indicated above we needed to ‘paint’ app 20 seconds to get the sculpture lightened up
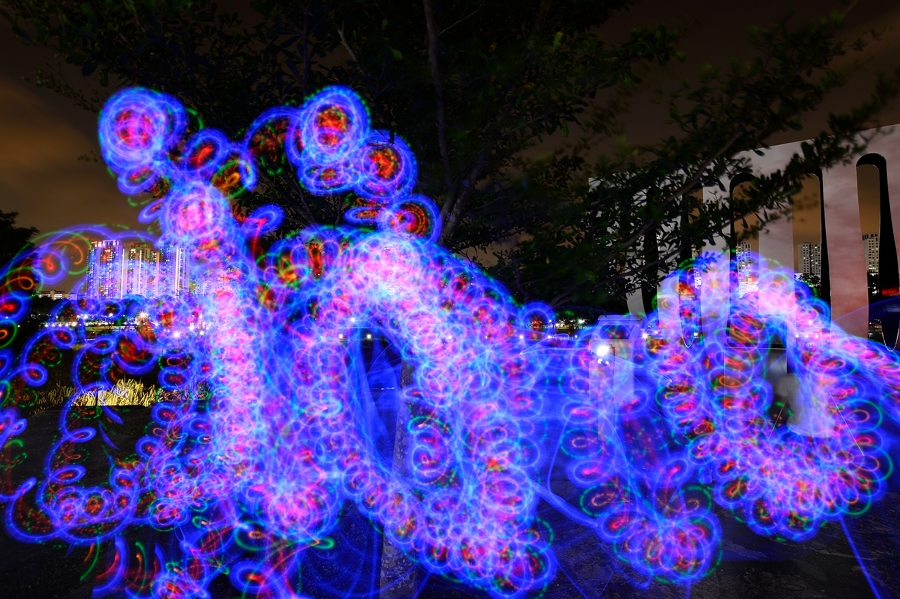
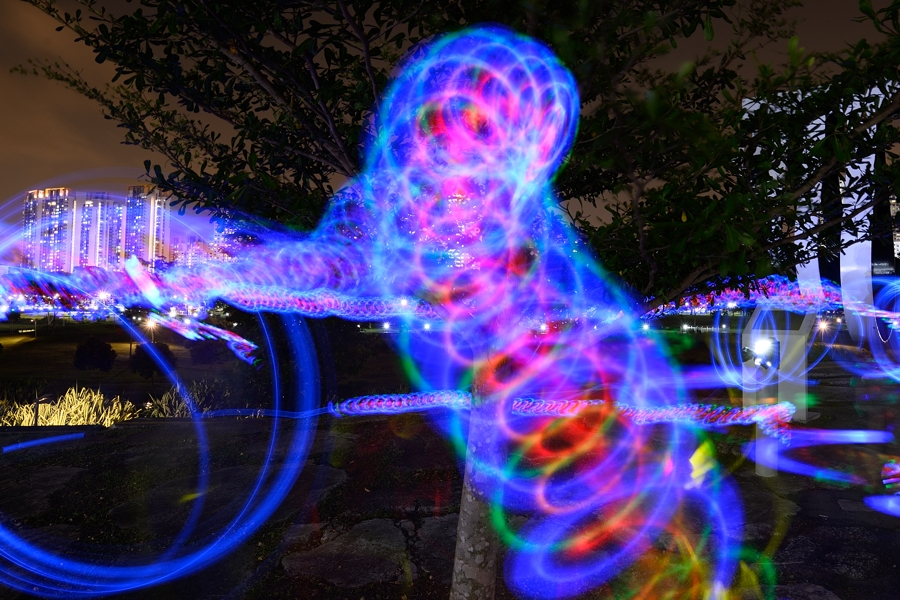
then move on to the foreground
if you have a partner in crime he/she can do the foreground simultaneously, if you are on your own, go and fetch a different light source, being careful not to point the light towards the camera and get into the flow…
the pictures below were exposed 60-85 seconds


all pictures (c) jrbc 2014, made with Nikon, Benro tripods and all kinds of light sources made in China
Leave a Reply
You must be logged in to post a comment.